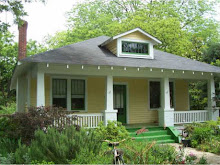
Wow! The house changes so much almost every day that we can't keep up with the photos. Here are some from the past week.
There is a tub on our front porch.
This was the mound of trash in the front yard. There is now a dumpster.
Looking down the side of the house. The addition now has new yellow pine siding and new double hung windows to match the existing windows.
The window on the left and the white foundation are part of the old house. You can see how they incorporated the new siding with the old.
Last week they put in the french door. The back door and antique transom window are not yet installed.
This week we have a deck!
I searched the internet for a neat deck rail and we decided on this paired baluster design. I think it looks really nice with our windows and craftsman style home.
The roof is shingled!
Currently the side of the house has been prepped and primed, so we'll be seeing some exterior paint soon. The interior is moving right along, with electrical, plumbing and HVAC mostly done.
Stay tuned!
Thursday, October 22, 2009
Monday, October 12, 2009
BIG Progress
All the framing is up for the addition. They breezed through most of it in about 6 days! Here are some shots of the outside:
guy working on the roof:
We really want to make sure the work we do stays true to the character of a 20's craftsman bungalow. I mean obviously they didn't make master suites originally in houses like this, but the beadboard and raftertails here that tie into the existing roof style are just some of those nice little details we can carry through:
Once we build the the deck, this is the view you'll have looking into our bedroom through the french doors....if you were a midget:
A look towards the view we'll have from our window seat:
French door hole that will open out onto the deck:Our bed will be flanked by these windows:Bathroom on the left and walk-in closet on the right:
This is the nook where our double sink vanity will go:
The alcove for the tub:
The newly created hallway:
Part of this bedroom was absorbed to make the hallway and we are moving the window that used to be on the back wall of this room to the back of the addition. Where the window was is now the closet door for this room, since the old closet (which will contain a stackable w/d unit) is now in the hallway:
We found a cool antique transom window that we're having installed above the back door that will lead out to the deck. ...I'll post pics of the transom later:
Doorway that used to lead outside from the kitchen now leads to the addition:and this is the view from the deck looking through the french doors....if you were a mouse:
From the new attic space looking down into the WIC:
Turning around and looking into the existing attic space...check out all that old knob and tube wiring that the previous owner was still using! We're replacing all that to bring it up to code and laying insulation over the whole attic:
Close-up of the 80 year old antique wiring:
And the disaster zone that is our driveway/spilling into the front yard. Actually, they've cleared out some of this since the photo, thankfully (our poor neighbors couldn't use the sidewalk for a little bit there)
guy working on the roof:
We really want to make sure the work we do stays true to the character of a 20's craftsman bungalow. I mean obviously they didn't make master suites originally in houses like this, but the beadboard and raftertails here that tie into the existing roof style are just some of those nice little details we can carry through:
Once we build the the deck, this is the view you'll have looking into our bedroom through the french doors....if you were a midget:
A look towards the view we'll have from our window seat:
French door hole that will open out onto the deck:Our bed will be flanked by these windows:Bathroom on the left and walk-in closet on the right:
This is the nook where our double sink vanity will go:
The alcove for the tub:
The newly created hallway:
Part of this bedroom was absorbed to make the hallway and we are moving the window that used to be on the back wall of this room to the back of the addition. Where the window was is now the closet door for this room, since the old closet (which will contain a stackable w/d unit) is now in the hallway:
We found a cool antique transom window that we're having installed above the back door that will lead out to the deck. ...I'll post pics of the transom later:
Doorway that used to lead outside from the kitchen now leads to the addition:and this is the view from the deck looking through the french doors....if you were a mouse:
From the new attic space looking down into the WIC:
Turning around and looking into the existing attic space...check out all that old knob and tube wiring that the previous owner was still using! We're replacing all that to bring it up to code and laying insulation over the whole attic:
Close-up of the 80 year old antique wiring:
And the disaster zone that is our driveway/spilling into the front yard. Actually, they've cleared out some of this since the photo, thankfully (our poor neighbors couldn't use the sidewalk for a little bit there)
Sunday, October 4, 2009
"The beautiful rests on the foundations of the necessary"
Exciting things are happening!
We have porta potty in our front yard!
Actually, as lovely as that is, that's not the real reason for this post. Check below for the real fun.
The driveway full of what will eventually be our new master suite:
threw this one in just to be artsy. ;)
...and voila, we have a foundation! It can only go up from here, right? :)
The floor joists are down and what used to be that weird little back porch/laundry room thing is now a gaping hole.
Stay tuned for the rest of the framing.
Floor Plans
Here are the final floor plans and design work I did for the existing house and the addition. They were created with a combination of SketchUp and Photoshop. We went through a gazillion different options before settling on this plan, but I think we ended up with a design that is a pretty efficient use of space and hits all the goals we had.
We ran into a few speed bumps along the road while designing, but were able to work around them. For instance, our original drawings involved building further out to the side, but after getting a survey, we discovered that not only would those plans stick out too far for the zoning laws, but also that our existing house actually encroached a few inches too far in the zoning.
The house was built before zoning regulations were in place, so it ended up being ok, but we still had to jump through a bunch of hoops to get the go ahead. We had to present before the board of adjustments and ask for a variance to "legalize" the existing structure and get approval to build the addition. We got the green light to build as long as the addition stays flush with the side of the existing house and that it doesn't stick out further than the house already was into the side-yard setback. We had to be a little more creative with how we used the space, but we're really excited about the final plan and think it will be awesome when it's all done. :)
Subscribe to:
Posts (Atom)