

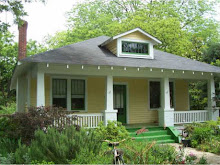
 But we are settled in now, so it's finally time for.....drum roll please......pics of how it all turned out in the end!
Here's our lovely new kitchen. We are really happy with how it turned out. If you'll recall I did a photo realistic concept image several months ago of what we wanted it to look like. It came out just how we planned and followed the concept image really well:
 Some various kitchen features...
white fireclay apron front farm sink
wall mounted gooseneck faucet
cherry butcher block countertops
glass faced upper cabinets
base cabinet lazy susan
white subway tile backsplash
vintage style partial inset cabinet doors
antique built-in shallow cabinet
walk-in pantry (that was there already)

we kept the stove and refrigerator, but the dishwasher is new.

In the middle of the pic below you can see the built-in we scored at an antique shop. It fits really great in that space. Kate stripped the old peeling paint off of it and we we had the carpenters do a small alteration to it to fit best in the space. We love it!


Here's a view looking down the new hallway toward the back of the house. In my opinion the antique transom window we had installed above the back door really "makes" this hallway.


Here's a picture of the transom before installation:

and a view from the other end of the hallway looking towards the middle of the house:

On to the pics of the finished addition! I designed the master bedroom so a king bed would fit nicely between these two windows. It worked out well:

On the back wall we have the built-in bookshelves and window seat. As a reminder, the double window there is the one we reused from the old back of the house.
Kate made roman shades for all the windows in here that you can raise from the bottom (shown on double window) or lower from the top (window on the right). That's great because we can let light in from the top pane, but still have the privacy shade on the bottom. :)

another shot of the built-ins. You can see a little sliver of the french doors on the left there. The room gets tons of great natural light!

French doors with a privacy sheers that Kate also made. The light fixture hanging from the ceiling is a 1920's antique I found on ebay and rewired:

The two dark doors are the master bath (left) and the master closet (right):

Again, it's hard to get a decent shot of the walk-in closet, but here ya go anyway. Not too huge, not too small....the layout works pretty good.

Our custom built double sink vanity and medicine cabinets in the new master bathroom!

We wanted to incorporate a historic aesthetic into into the new bathroom to keep with the era of the house. One of the ways we did that was by putting down a classic white hex tile floor. We went with 1.5" matte finish hex tiles and love em!

It's a bit unconventional for a bathroom, but we decided to put apron front sinks in there and I think ended up really working. I can tend to get a bit crazy about little details sometimes and searched long and hard for this small gooseneck faucet with porcelain cross handles, but ended up tracking a pair down and think they're awesome. They make me happy in their own little way. :)

Just a shot so you can get a feel for where the bathtub is in comparison to the vanity. btw, the counters in here are marble and the wainscoting is beadboard.

Although we didn't go so far as to put a clawfoot tub in here, we still wanted to tie in that classic 1920's feel to the bathing area. So, we used white subway tiles for the shower walls, installed matching porcelain cross faucet/diverter handles, and went with a nice cast iron alcove tub.

The relation of where the tub is to the door (just so you can get the full 360 degree view) :).

Looking from the master bathroom into the bedroom.

Dual flush toilet! Energy efficiency for the win!

A shot just to show that the bathroom has a window. The natural light is wonderful in the morning!

Here's the living room. For a quick recap on what we did the existing house, the plaster ceilings were all in bad shape, so we drywalled over all of them in the house (including the living room here). All the walls also had bad peeling paint and cracking issues, so they were all smoothed out and skim coated with new mud....Then of course it was all painted. We went with a fairly subtle light color in the living room to keep the front rooms fairly modest in terms of color and to contrast some of the bolder colors in the rest of the house. The floors were refinished (which you can't really see in this photo because of the rug). Other than that, we didn't want to visually change much in these front of areas of the house....just clean-up what was mentioned, rewire all the electrical etc.

The renovated bathroom. Besides the electrical, plumbing, wall, ceiling, and floor work, we also removed a funny little vanity that was put in at some point in the past and replaced it with a pedestal sink (it works so much better in the space), we added the beadboard wainscoting, and the ceiling light fixture. Repainting in here made a world of difference too, it used to be all multicolor pastel colors (I referred to it as an easter egg paint job).

Below is the middle hub/hallway area. Check out the redesign of the linen closet/cabinet built-in. When we bought the house there was something there that had been added at some point, but it didn't really utilize the space, or aesthetically match the house for that matter. Plus we wanted to move the big air return from the floor to the bottom of the built-in. (btw, I designed the pattern for the return grille and had it laser cut, rather than having the standard metal slotted grille....I'm a bit detail oriented. haha ;D )
Under the rug there is where the giant return floor grate used to be. We had it patched in with wood floor.

Below is the dining room. Just the standard electric, walls, floors, ceiling, paint work was done in here.


The breakfast nook area. Again just the same surface repair & electrical as the rest of the house.

A shot of the finished back of the house, with the new addition on the left there and the existing house on the right. Check out our lovely new deck which had lattice added and was stained since the last pictures.

The french doors into in the master bedroom and the back door with transom window.

That's it! We may update the blog with a few more in-depth process pics we hadn't posted before for those who are interested, but for now I hope ya'll enjoyed looking at our start to finish chronicle of our renovation. Thanks for stopping by!!
- Ben & Kate


kate here,
ReplyDeleteI just want to say that all the cabinetry (kitchen, bathroom, linen closet and master built-ins) were hand made on site. Also the door trim and baseboards were hand milled to match the old house. We're really impressed with the quality and care that the carpenters put into this job. We love our new old house. two thumbs up.
I was just going to ask where you found the gorgeous vanity in the master bath!
ReplyDeleteYour house is so charming!
Wow! Love your house! You guys did a great job on it. Especially love the hex floors in the b-room. We're doing a reno and I'm looking for inspiration pics...I think I found it!
ReplyDeleteI love your house! I keep checking back to it for ideas/inspiration. I'm currently looking for old 1920's fixtures for my house (which is really similar to yours) and I came across a set of 2 globes like the ones in your living room/bath. These ones (the shape) seem to be very hard to find, so I thought I'd send you the link (eBay). The seller only wants 12$ each which is a steal.
ReplyDeletehttp://cgi.ebay.ca/Vintage-Frosted-White-Glass-Lamp-Shade-Maker-Unknown-/160467882953?pt=LH_DefaultDomain_0&hash=item255ca193c9
Update: This seller has two at 9.99!!
ReplyDelete:)
I just thought it would be convenient to have one or two spares.
http://cgi.ebay.ca/Bell-Shape-Horizontal-Rib-White-Clear-Glass-Bulb-Shade-/260751299909?pt=LH_DefaultDomain_0&hash=item3cb5fd1545
Where did you find the apron front sinks for your bathroom? They look wonderful!
ReplyDeleteThe sinks are actually vessel sinks that are supposed to go on top of your counter, but I thought they would work well as undermount apron fronts and I ended up being very pleased with how it turned out.
Delete